How to Enable TPM in Gigabyte BIOS for Windows 11
On this page
Gigabyte and AORUS boards use different menu names than ASUS or MSI, and TPM is often buried under Peripherals or Settings. If your PC Health Check says you’re blocked by TPM 2.0, this guide walks you through enabling it on modern Gigabyte Intel and AMD motherboards.
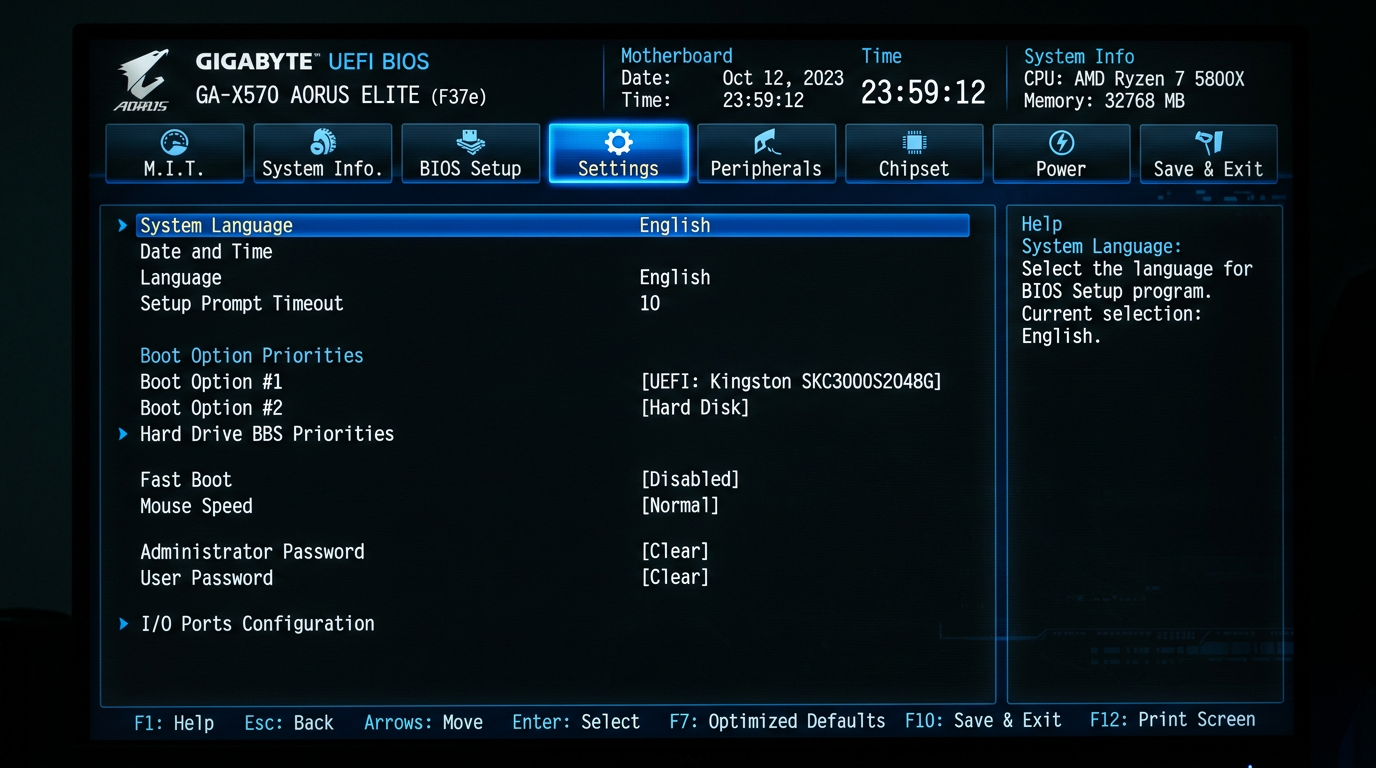
What TPM looks like on Gigabyte
On recent Gigabyte UEFI BIOS versions, TPM usually appears as:
- Intel Platform Trust Technology (PTT) on Intel CPUs
- AMD CPU fTPM on Ryzen CPUs
Common menu paths:
- Settings → Miscellaneous → Trusted Computing, or
- Peripherals → Trusted Computing
Step 1 – Enter Gigabyte UEFI BIOS
- Shut down your PC.
- Turn it back on and repeatedly press
Delto enter BIOS. - If you see a super‑simplified Easy Mode, press F2 to switch to Classic/Advanced Mode so all menus are visible.
Gigabyte sometimes changes the visual skin between AORUS gaming and standard boards, but the menu locations stay similar.
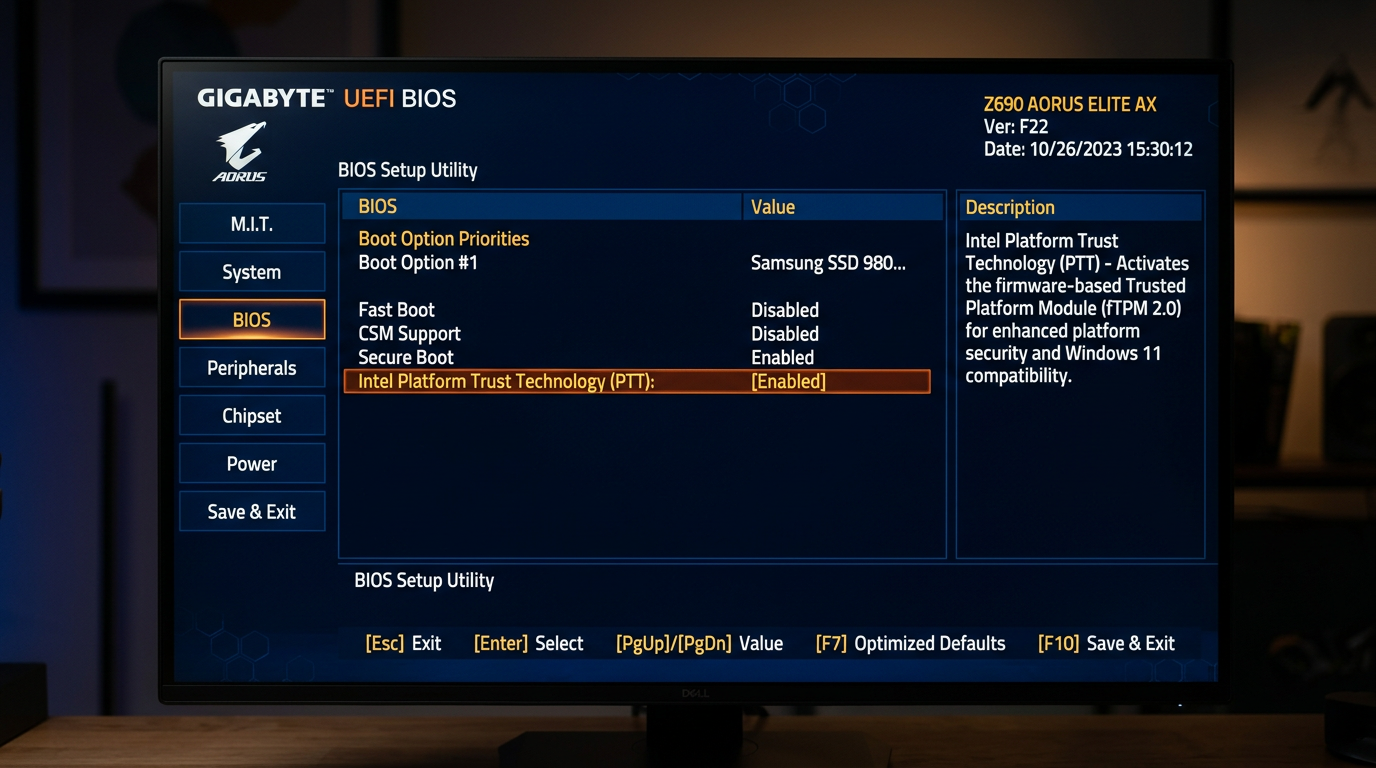
Step 2 – Enable TPM on Intel Gigabyte boards (PTT)
For Intel chipsets like B560/B660/Z690/Z790:
- In BIOS, go to the Settings or Peripherals tab (depends on BIOS version).
- Look for Intel Platform Trust Technology or a Trusted Computing submenu.
- If there is a Trusted Computing page:
- Set Security Device Support to Enabled.
- Set TPM Device Selection to PTT or Firmware TPM.
- If you see Intel Platform Trust Technology as a single item, just set it to Enabled.
Avoid toggling any Clear TPM / Clear Security Device options unless you understand BitLocker and recovery keys.
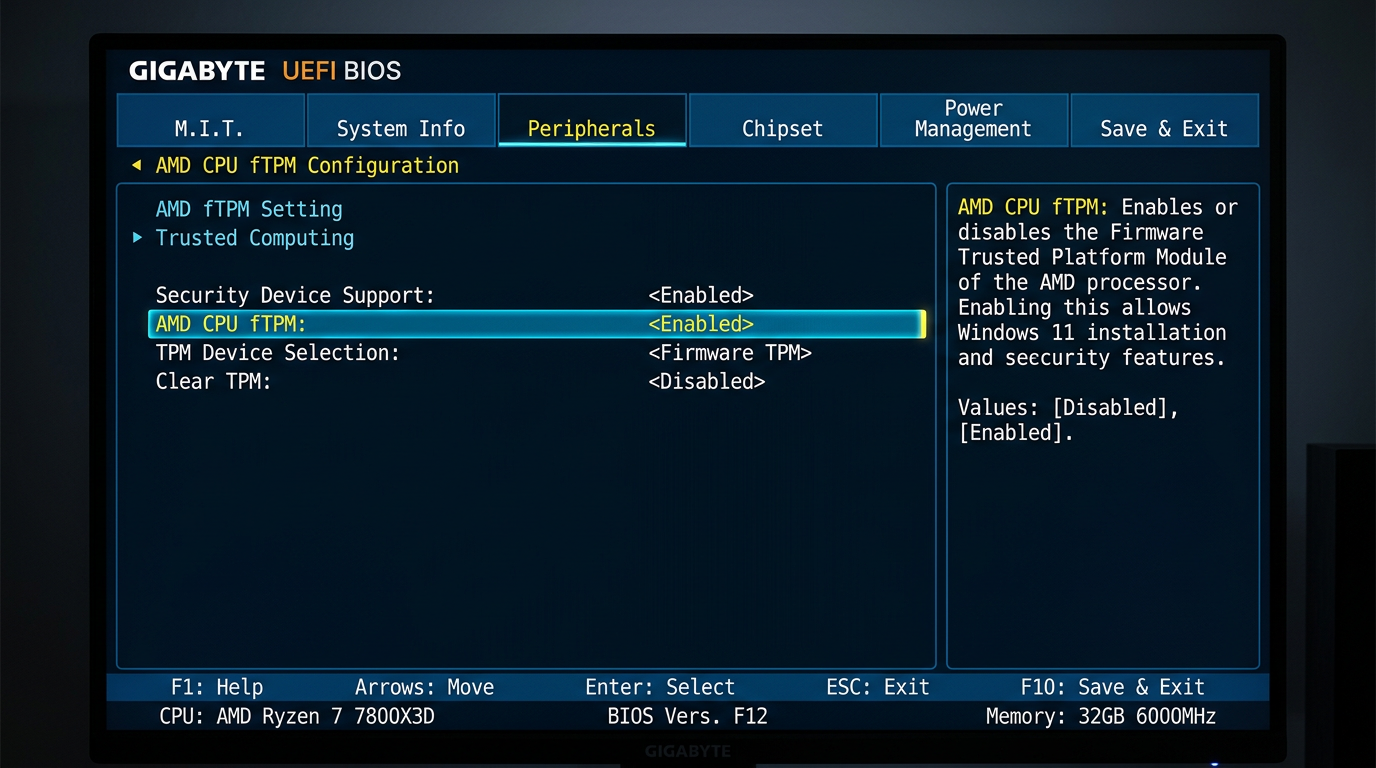
Step 3 – Enable fTPM on Gigabyte AMD boards
On AMD Ryzen chipsets (B450/B550/X570/B650/X670):
- Open the Settings or Peripherals menu.
- Go into Trusted Computing if present.
- Set Security Device Support to Enabled.
- Set TPM Device Selection (or similar) to AMD CPU fTPM.
If you don’t see a Trusted Computing page:
- Check under Settings → Miscellaneous for AMD CPU fTPM directly.
- Set it to Enabled.
Step 4 – Confirm UEFI and Secure Boot on Gigabyte
To make Windows 11 fully happy, you also need UEFI boot with Secure Boot available:
- In BIOS, go to BIOS or Settings → Boot (exact name varies).
- Make sure:
- CSM Support is Disabled (for pure UEFI).
- Your system drive is set as a UEFI boot option.
- Enter the Secure Boot menu:
- Set Secure Boot to Enabled.
- Use Standard or Windows UEFI as the OS type when available.
If disabling CSM causes boot failure, your drive is likely MBR:
- Turn CSM back On so you can boot again.
- Keep TPM Enabled.
- Plan a GPT conversion before you fully switch to a Windows‑11‑style UEFI‑only setup.
Step 5 – Save changes properly on Gigabyte
- Press F10 to bring up the Save & Exit dialog.
- Confirm that you’re saving changes to:
- Intel PTT / AMD CPU fTPM = Enabled
- Security Device Support = Enabled (where applicable)
- Choose Yes to save and reboot.
Gigabyte boards usually flash a brief notice when new security devices are initialized; that’s normal.
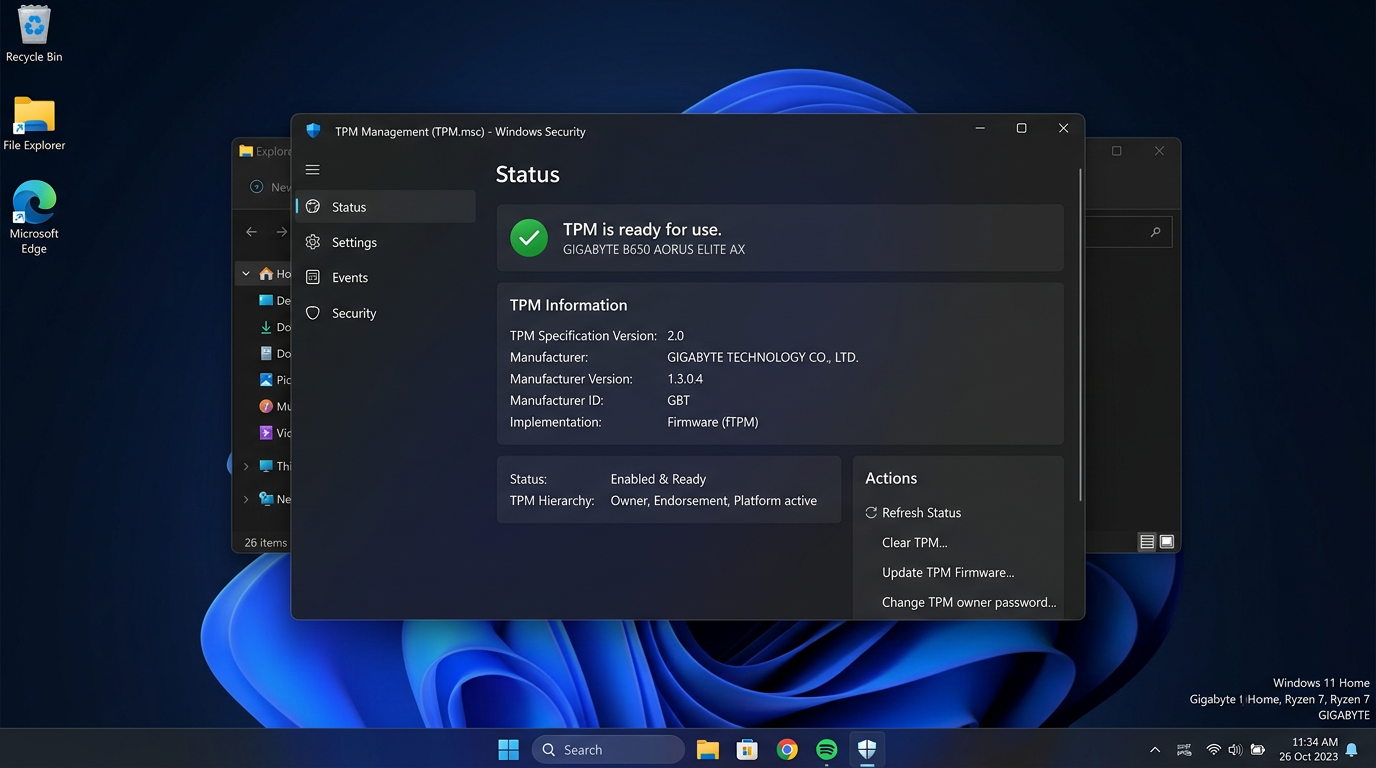
Step 6 – Verify TPM 2.0 in Windows
Back inside Windows:
- Press
Win + R, typetpm.msc, press Enter. - In TPM Management, verify:
- Status: “The TPM is ready for use”
- Specification Version: 2.0
If you still get “Compatible TPM cannot be found”:
- Re‑enter BIOS with
Del. - Confirm AMD CPU fTPM or Intel PTT is still Enabled.
- Make sure you saved with F10, not just backed out with Esc.
- Update to the latest Gigabyte/AORUS BIOS from their support site.
AORUS vs regular Gigabyte boards – differences that matter
AORUS gaming series (Elite, Master, Xtreme)
- Usually have the most up‑to‑date Windows 11 presets.
- Some BIOS versions expose a Windows 10/11 Features toggle:
- Set it to Windows 11 or Windows 10/11 and it will pre‑configure some security settings.
- Always double‑check Trusted Computing afterwards so you know TPM is actually on.
Standard Gigabyte series (UD, DS3H, D3H, etc.)
- Often present fewer “auto” presets.
- You may need to:
- Manually enable Security Device Support.
- Manually choose PTT or AMD CPU fTPM.
Older Gigabyte boards with add‑on TPM headers
- Some older LGA115x and AM3+ models have a physical TPM header and optional module.
- If you’re on a CPU officially unsupported by Windows 11, a discrete TPM won’t magically fix that.
- For modern Ryzen and Intel platforms, use firmware TPM (fTPM/PTT) instead of buying a module.
Does TPM on Gigabyte hurt gaming performance?
On Gigabyte and AORUS systems:
- Firmware TPM adds virtually no CPU overhead during gaming.
- Once Windows has booted and BitLocker keys are handled, the TPM spends most of its time idle.
- You should not see any meaningful change in FPS, frame times, or input latency in titles like Fortnite, Apex Legends, Warzone, or Valorant.
If you’re optimizing your entire PC around competitive play, pair this with:
- How to minimize input delay for competitive gaming
- How to debloat Windows to optimize PC for gaming (Fortnite, Apex, Warzone, COD, Valorant)
One‑page cheat sheet – Gigabyte TPM for Windows 11
For quick reference on Gigabyte and AORUS motherboards:
- Intel:
Settings / Peripherals → Intel Platform Trust Technology→ Enabled- or
Trusted Computing → Security Device Support = Enabled, TPM Device Selection = PTT
- AMD:
Settings / Peripherals → Trusted Computing→ **Security Device Support = Enabled, TPM Device Selection = AMD CPU fTPM`
- Confirm UEFI boot and Secure Boot are available under BIOS / Boot / Secure Boot.
- In Windows, run
tpm.mscand check for TPM 2.0, ready for use.
Once these are set, your Gigabyte gaming PC should clear Windows 11’s TPM requirement without needing registry hacks or risky workarounds.