How to Enable TPM in ASUS BIOS for Windows 11
On this page
If your ASUS gaming rig fails the Windows 11 TPM 2.0 requirement, you probably just need to flip a few settings in BIOS. This guide walks you through enabling fTPM / PTT on modern ASUS boards without nuking your overclocks or RAID setups.
This guide is written specifically for ASUS motherboards (ROG, TUF, PRIME, ProArt, etc.) using modern UEFI BIOS. If you have MSI, Gigabyte, or ASRock, use those brand‑specific TPM guides instead.
Quick checklist before you touch BIOS
- Back up important data: Enabling TPM should be safe, but always assume something can go wrong.
- Know your current boot mode: Windows 11 wants UEFI + GPT, not Legacy/CSM.
- Have a keyboard and monitor connected directly (no remote access).
- Update Windows first so it can detect TPM after you change BIOS.
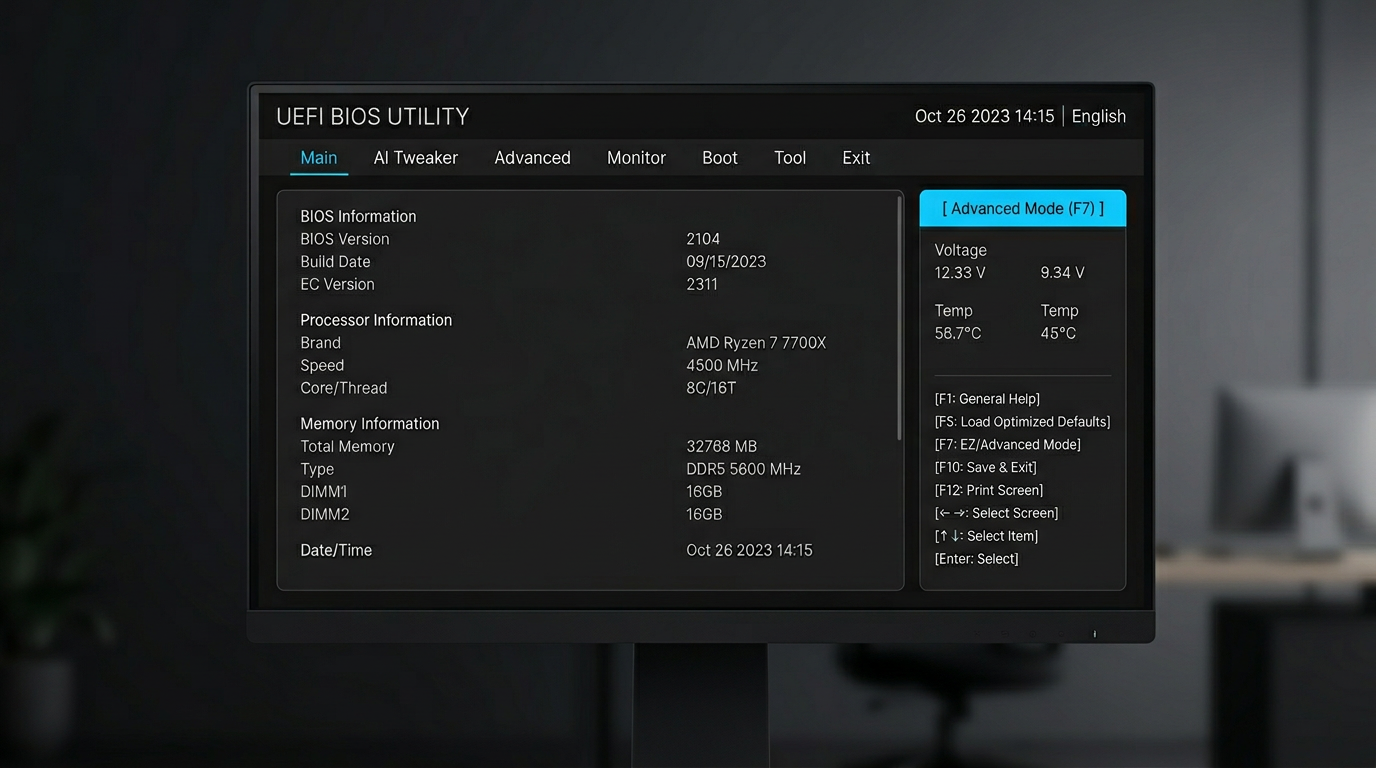
Step 1 – Enter the ASUS UEFI BIOS
- Fully shut down your PC.
- Power it on and repeatedly tap
Del(sometimesF2) as soon as you see the ASUS logo. - You should land on the EZ Mode home screen.
You can switch between modes:
- F7 → Advanced Mode
- F7 again → back to EZ Mode
For most TPM options we’ll be working in Advanced Mode.
Step 2 – Find the TPM setting on modern ASUS boards
Depending on your CPU platform, TPM can show up with slightly different names:
- Intel 8th gen and newer: look for PTT (Intel Platform Trust Technology)
- AMD Ryzen platforms: look for AMD fTPM or AMD TPM
From Advanced Mode:
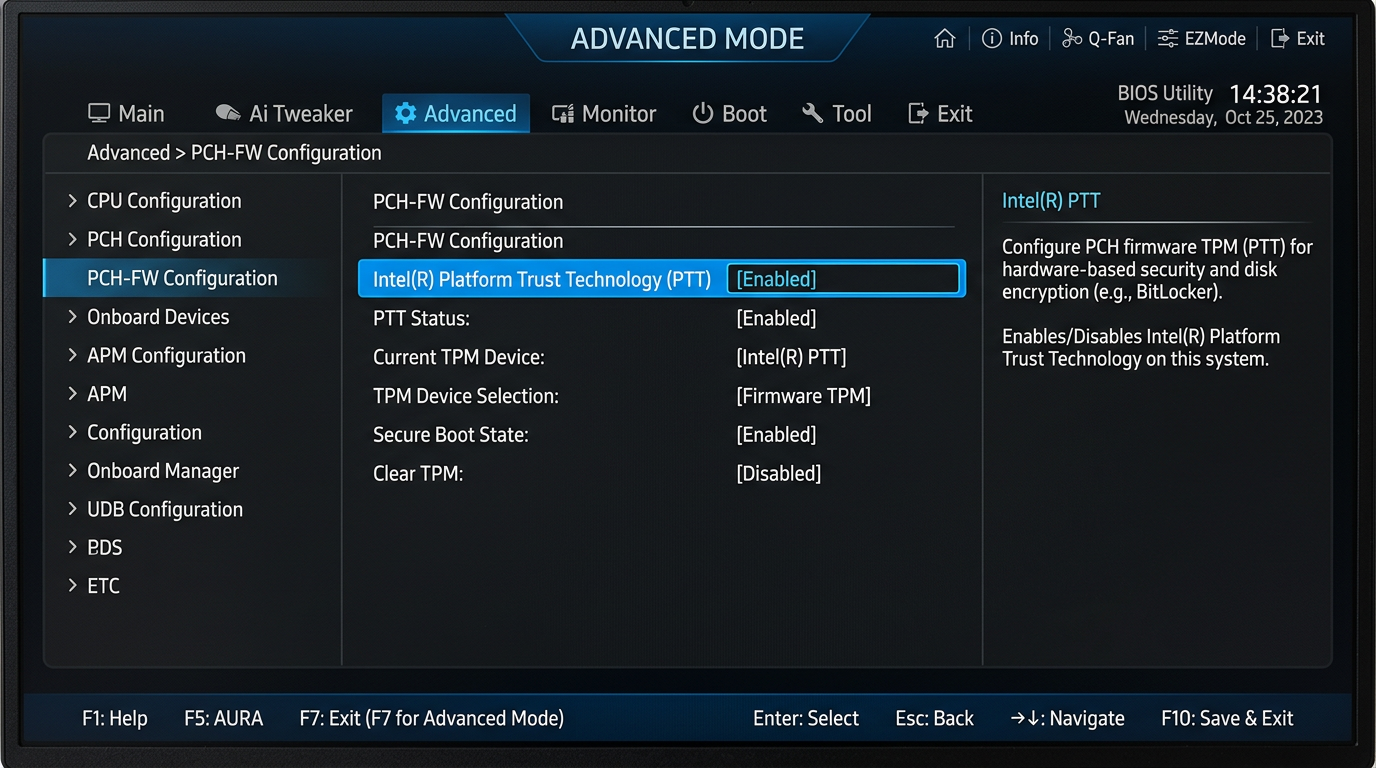
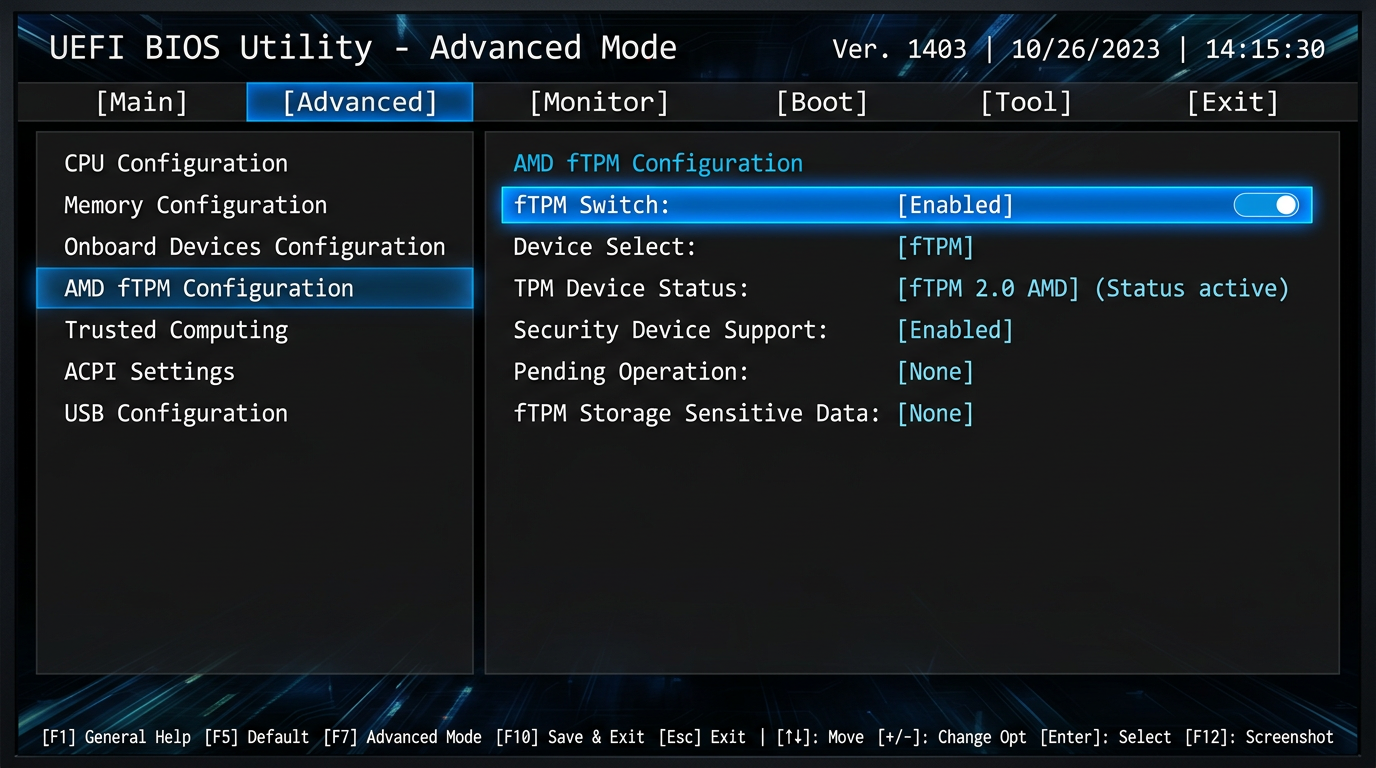
- Go to the Advanced tab at the top.
- Open PCH-FW Configuration, Trusted Computing, or AMD fTPM configuration (the exact wording varies by board and BIOS version).
- Look for one of:
- TPM Device Selection
- PTT (Intel)
- AMD fTPM switch
Example layouts:
- ASUS ROG / TUF Intel boards
Advanced → PCH-FW Configuration → PTT - ASUS ROG / TUF AMD boards
Advanced → AMD fTPM configuration → AMD fTPM
Step 3 – Turn on fTPM / PTT in ASUS BIOS
Once you’ve found the correct page:
On Intel ASUS motherboards
- Set PTT to Enabled.
- If you see TPM Device Selection, choose Firmware TPM instead of Discrete TPM (unless you have a physical TPM module installed).
- Leave any “Clear TPM” options disabled – you do not want to clear TPM here.
On AMD ASUS motherboards
- Set AMD fTPM (or Firmware TPM) to Enabled.
- Leave dTPM or Discrete TPM disabled unless you know you’re using a physical module.
- Again, do not use any “Clear fTPM” or “Reset fTPM” options unless you understand the consequences.
Step 4 – Confirm Secure Boot and UEFI mode
Windows 11 also expects Secure Boot and UEFI:
- In Advanced Mode, go to the Boot tab.
- Make sure CSM (Compatibility Support Module) is Disabled on modern builds.
- If disabling CSM breaks booting, your drive might be using MBR instead of GPT – convert it before trying again.
- Go to Secure Boot:
- Set OS Type to Windows UEFI mode.
- Set Secure Boot to Enabled (or leave it on Standard if that’s the only option).
If you’re unsure about CSM and drive layout, handle TPM first, then come back and tune CSM/Secure Boot after verifying Windows still boots.
Step 5 – Save and reboot correctly
- Press F10 to bring up the Save & Exit dialog.
- Double‑check that your changes include PTT / fTPM = Enabled.
- Select OK and let the board reboot into Windows.
If your system hangs on a black screen or loops, power it off, then:
- Re‑enter BIOS (
Del/F2) - Revert only the last change you made (usually CSM or Secure Boot), leave TPM enabled
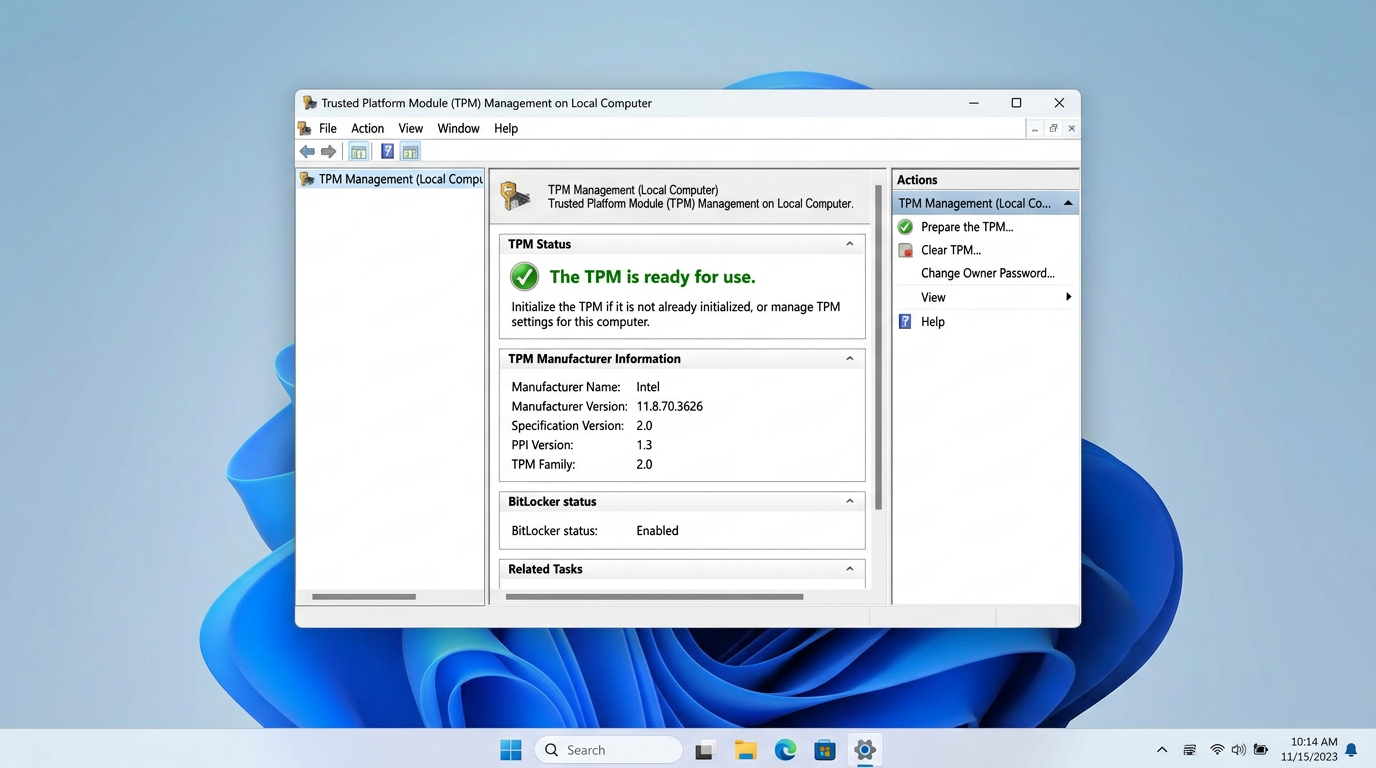
Step 6 – Verify TPM from inside Windows 11
Once you’re back in Windows:
- Press
Win + R, typetpm.msc, and press Enter. - In the TPM Management window, check:
- Status: “The TPM is ready for use”
- TPM Manufacturer Information → Specification Version: should show 2.0
If you still see “TPM not found”:
- Confirm you actually Saved & Exited BIOS, not just exited.
- Double‑check the correct option (PTT vs fTPM) is enabled on your ASUS board.
- Update to the latest BIOS version from ASUS if you’re on a very old release.
Troubleshooting on specific ASUS lineups
ROG Strix / ROG Crosshair / ROG Maximus
These usually expose all firmware features by default:
- Use Advanced Mode → Advanced → PCH-FW Configuration (Intel) or AMD fTPM configuration (AMD).
- Some high‑end boards have extra security menus; if you see a separate Trusted Computing page, enable TPM there as well.
ASUS TUF Gaming
TUF boards often group security options together:
- Look under Advanced → Trusted Computing first.
- If you don’t see TPM options, update to a modern Windows 11‑ready BIOS from ASUS Support.
ASUS PRIME / ProArt / business‑class boards
These sometimes ship with TPM disabled for compatibility:
- Check Advanced → PCH-FW Configuration and Advanced → Trusted Computing.
- On older Intel PRIME boards, you might have to enable Intel Platform Trust Technology directly.
Does enabling TPM affect gaming performance?
On modern ASUS systems, firmware TPM has essentially zero impact on gaming FPS or latency:
- It runs alongside your CPU, but the load is negligible.
- It mainly handles encryption keys and secure boot checks, not real‑time game logic.
- You should not see any measurable performance loss in titles like Fortnite, Apex Legends, or Warzone.
If you’re optimizing your whole rig for competitive play, combine this guide with:
- How to minimize input delay for competitive gaming
- The ultimate guide to timer resolution for gaming + Tier1Timer
Summary – ASUS TPM settings for Windows 11
To recap for ASUS boards:
- Enable PTT (Intel) or AMD fTPM (AMD) under Advanced → PCH-FW Configuration / AMD fTPM configuration / Trusted Computing.
- Keep Firmware TPM selected unless you use a discrete module.
- Use UEFI + Secure Boot for full Windows 11 compatibility.
- Verify inside Windows with
tpm.mscand look for TPM 2.0, “ready for use”.
Once this is set, your ASUS gaming PC should pass the Windows 11 PC Health Check without hacks, ready for the latest features and security updates.